Spot Workload Placement
Spot Workload Placement automatically splits deployment replicas between On-Demand and Spot nodes via a MutatingWebhookConfiguration — no YAML changes required. Navigate to Karpenter > Spot Workload in the sidebar.
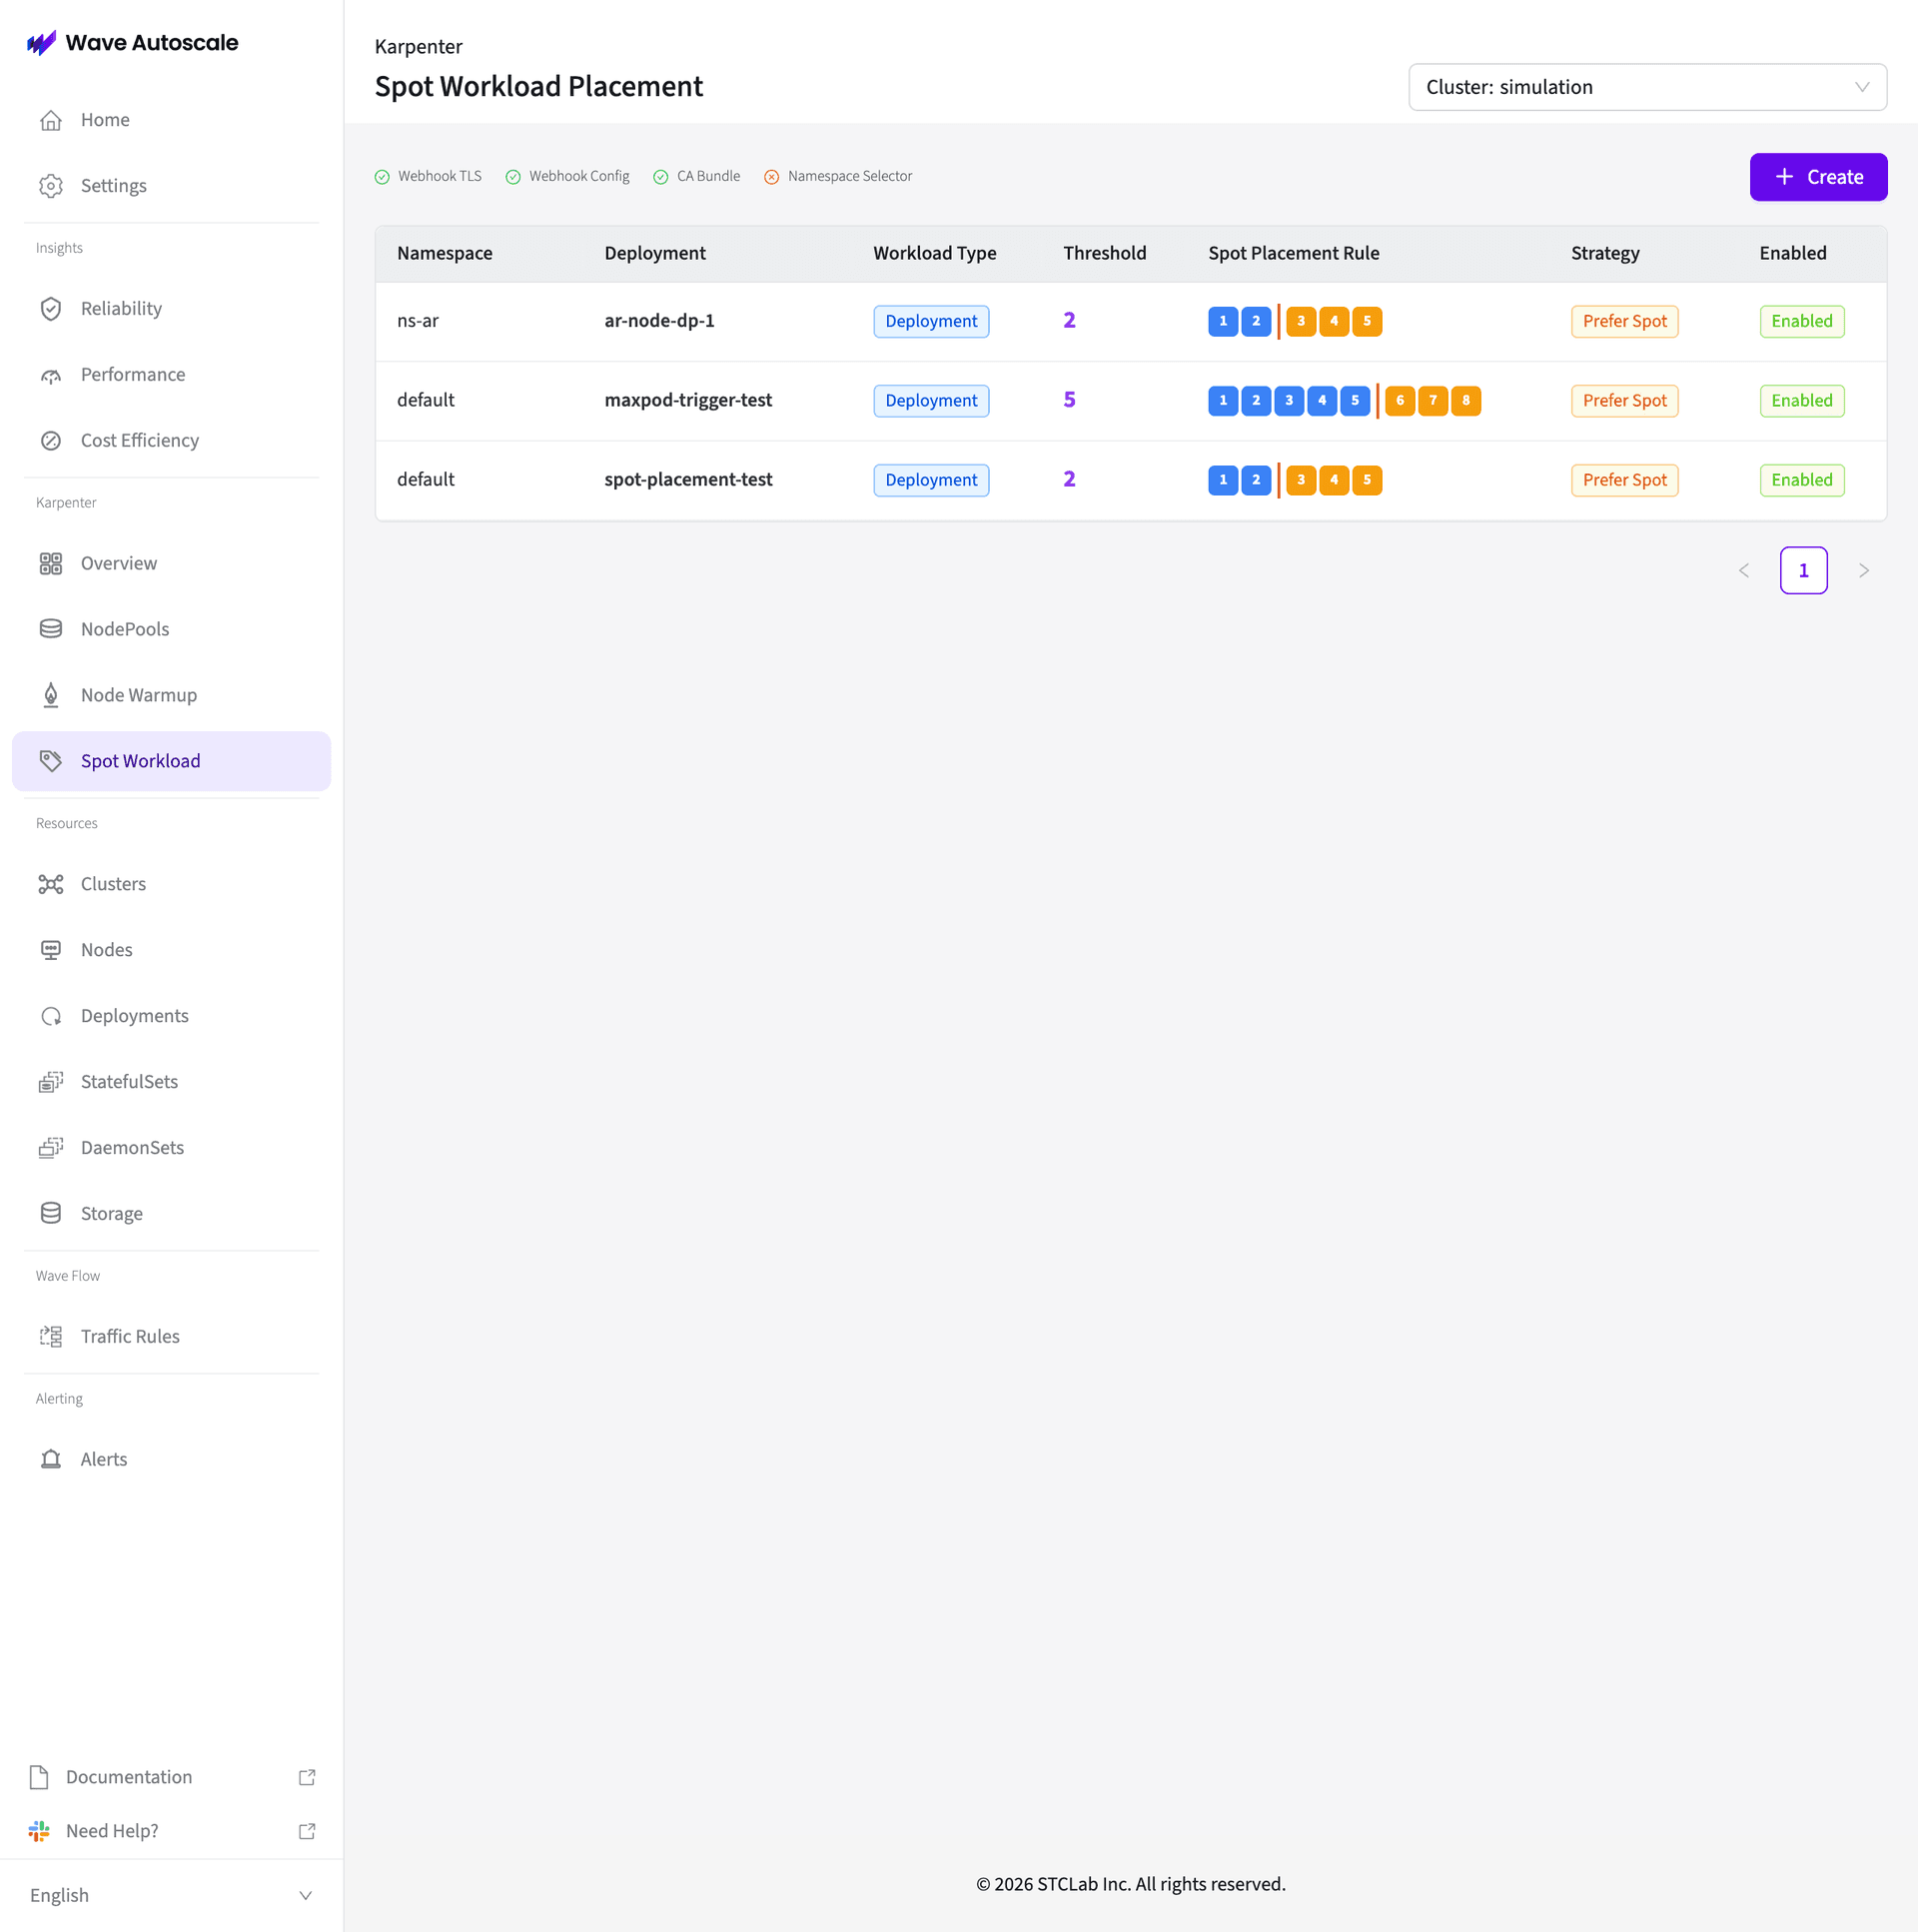
Status Indicators
At the top of the page, status badges show the health of the webhook infrastructure:
- Webhook TLS — TLS certificate status
- Webhook Config — MutatingWebhookConfiguration registration
- CA Bundle — Certificate authority bundle status
- Namespace Selector — Namespace targeting configuration
All indicators should show green for Spot Placement to function correctly.
Spot Placement List
The list view shows all configured spot placement rules:
| Column | Description |
|---|---|
| Namespace | Kubernetes namespace |
| Deployment | Target deployment name |
| Workload Type | Deployment type |
| Threshold | Pod Spot Threshold number |
| Spot Placement Rule | Visual representation — blue pods (On-Demand) and orange pods (Spot) |
| Strategy | Prefer Spot or Require Spot |
| Enabled | Active status |
Click + Create to add a new rule, or click an existing row to edit.
Creating a Spot Placement Rule
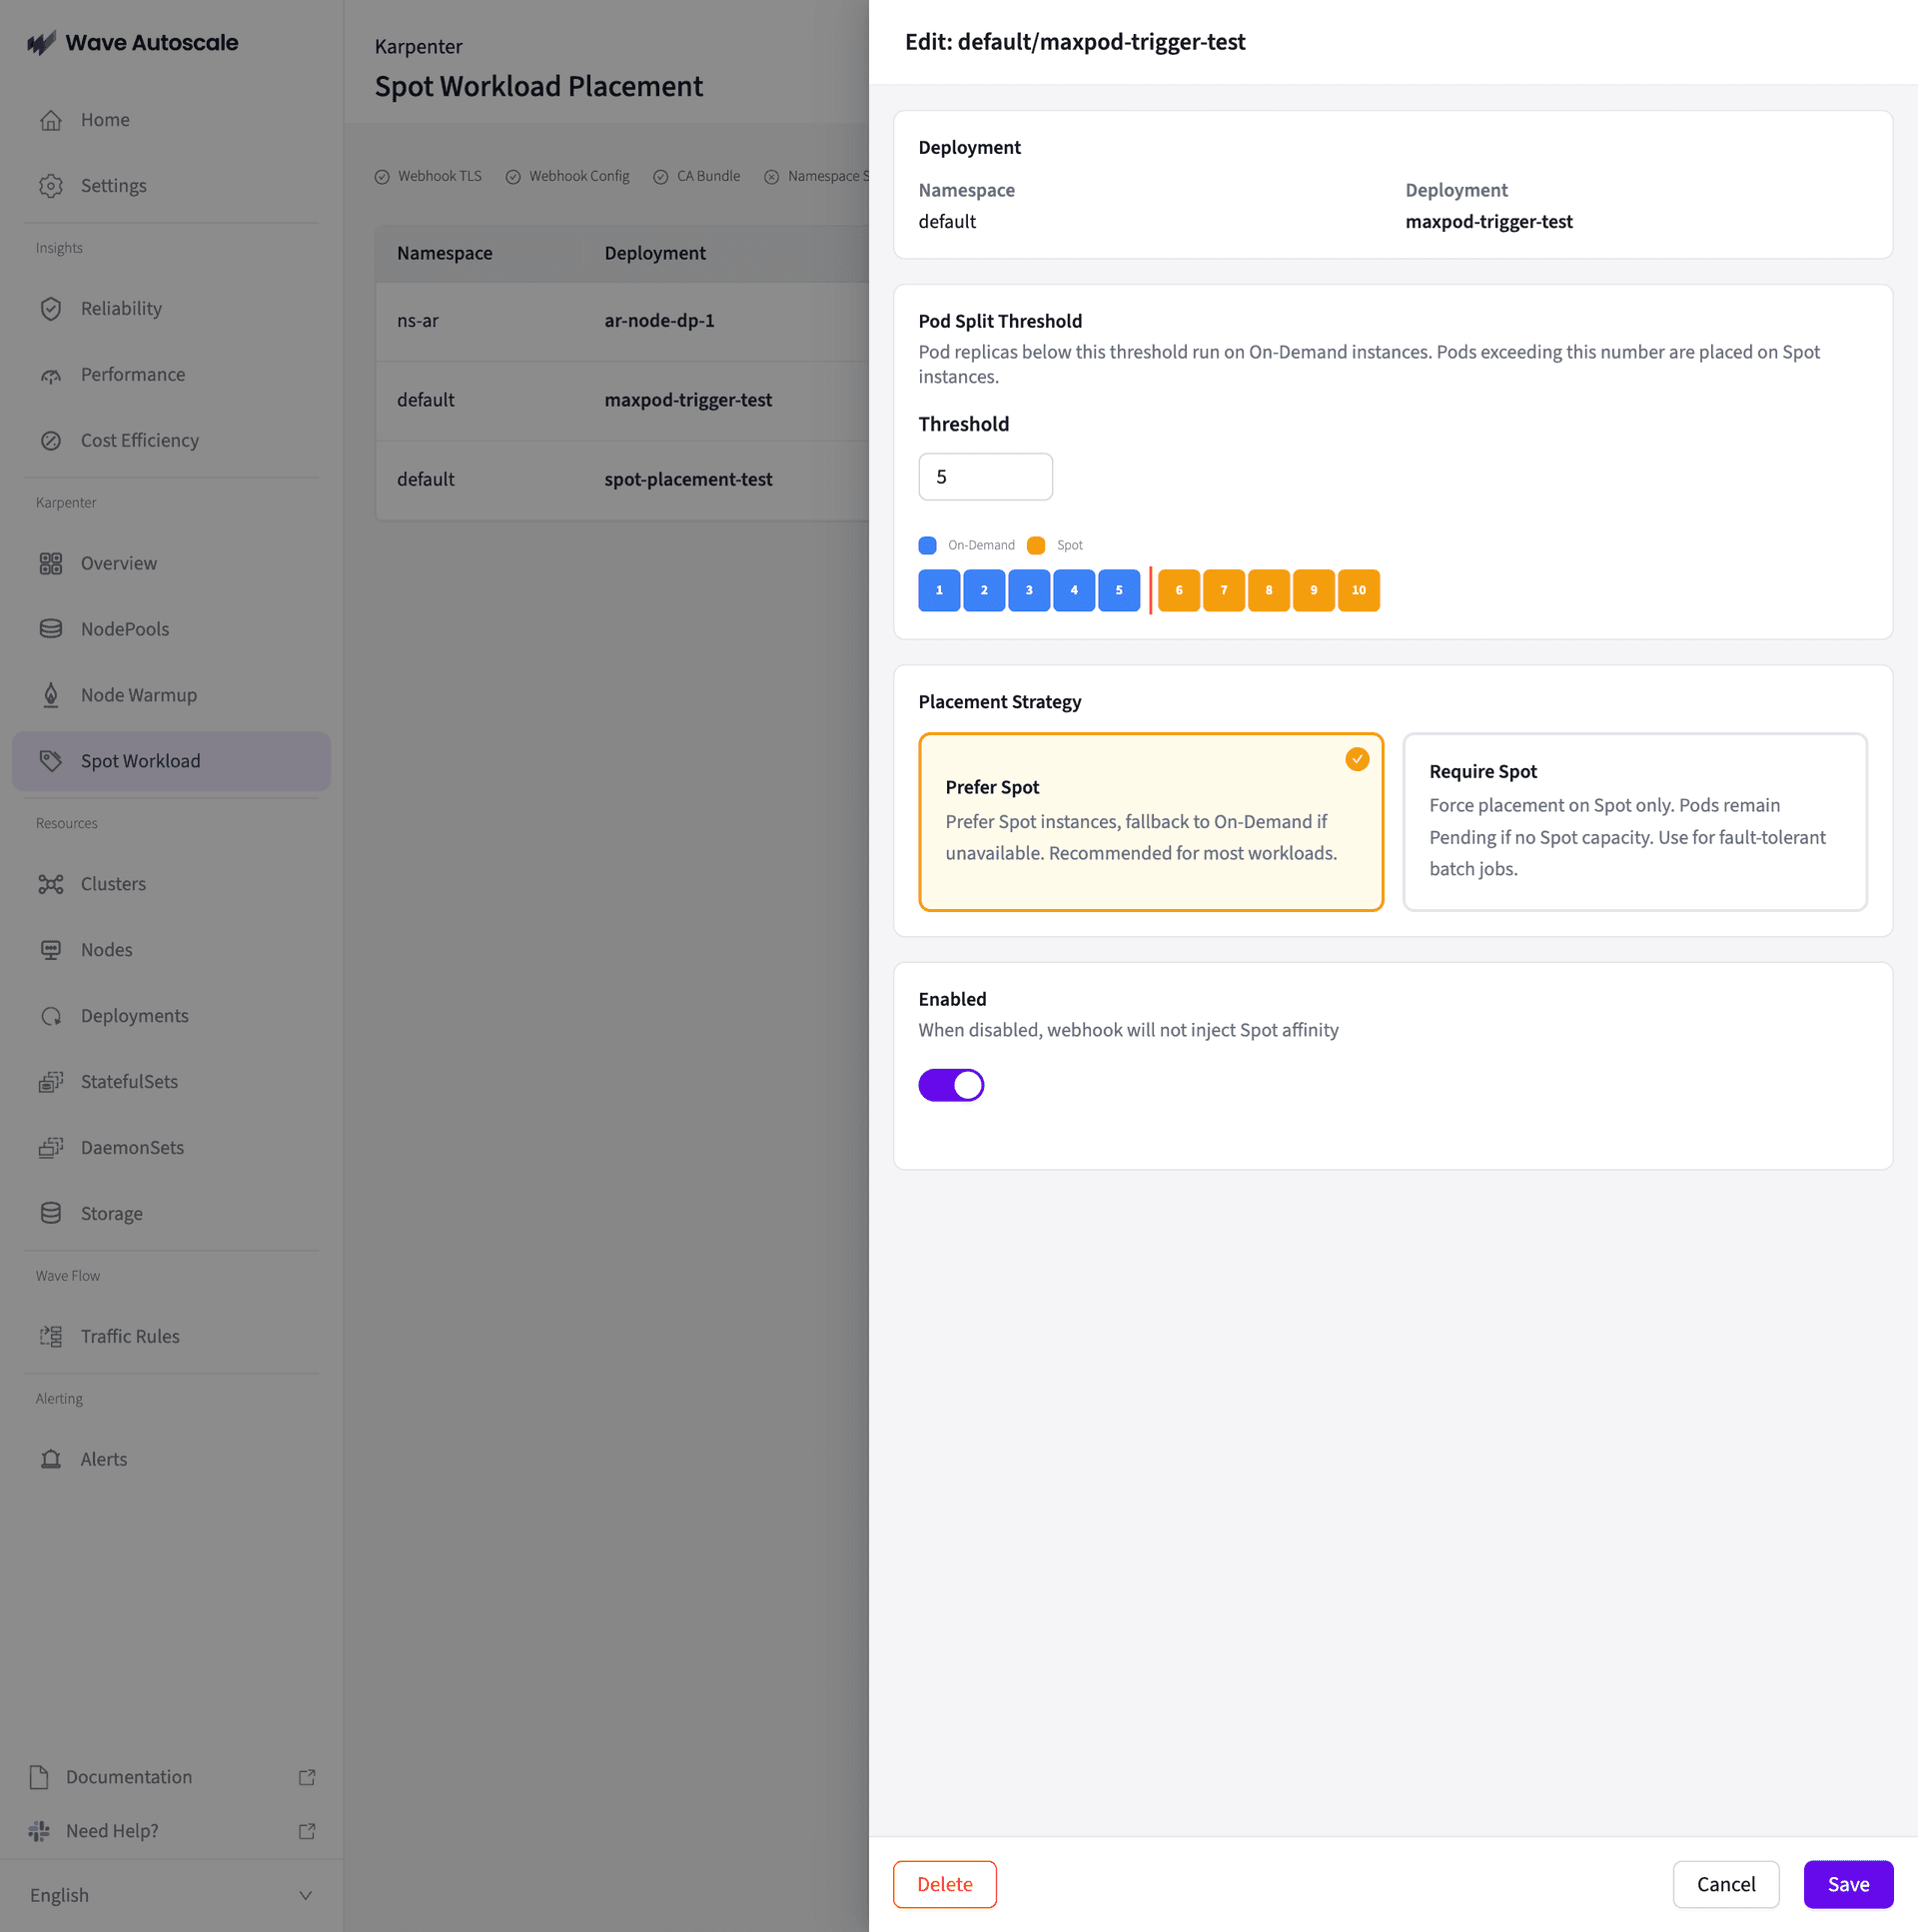
Click + Create to open the configuration panel:
Step 1: Select Deployment
Choose the target Namespace and Deployment from the form.
Step 2: Set Pod Split Threshold
Enter the Threshold number. Pod replicas below this number run on On-Demand instances. Pods exceeding this number are placed on Spot instances.
The UI shows a visual representation of the split — blue pods for On-Demand, orange pods for Spot. For example, with threshold 5 and 10 replicas:
- Pods 1-5: 🔵🔵🔵🔵🔵 (On-Demand)
- Pods 6-10: 🟠🟠🟠🟠🟠 (Spot)
Step 3: Choose Placement Strategy
| Strategy | Description |
|---|---|
| Prefer Spot | Prefer Spot instances, fallback to On-Demand if unavailable. Recommended for most workloads |
| Require Spot | Force placement on Spot only. Pods remain Pending if no Spot capacity. Use for fault-tolerant batch jobs |
Step 4: Enable
Toggle Enabled ON. When disabled, the webhook will not inject Spot affinity rules.
Step 5: Save
Click Save to activate the rule.
How It Works
- Threshold Configuration — You set a per-deployment Pod Spot Threshold via the WA Console
- Webhook Interception — The MutatingWebhookConfiguration intercepts pod creation events
- Affinity Injection — Based on the pod's ordinal index relative to the threshold, Wave injects
nodeAffinityrules - Intelligent Placement — Pods below threshold → On-Demand, pods above threshold → Spot
Webhook TLS Setup
Spot Placement requires a valid TLS certificate for the MutatingWebhookConfiguration. See the Getting Started guide for setup.
Without valid TLS certificates, the Kubernetes API server will reject webhook requests and spot placement rules will not be applied. Use cert-manager with auto-renewal for production deployments.
Cost Impact
Spot instances are 60-90% less expensive than equivalent On-Demand instances (per AWS pricing). Actual savings depend on your spot ratio — the more replicas above the threshold, the greater the savings.
The 60-90% range refers to AWS spot instance pricing vs. on-demand. Total compute savings depend on the proportion of pods on Spot instances. Monitor your cost in the Dashboard.
Limitations
- EKS only — Requires Amazon EKS with Karpenter
- Spot interruptions — AWS can reclaim Spot instances with 2-minute notice. Use the Prefer strategy for workloads needing guaranteed availability
- Stateful workloads — Not recommended for databases or persistent queues unless combined with proper data replication
Related
- Getting Started — Webhook TLS setup instructions
- Dashboard — Monitor spot ratio and cost savings
- Node Warmup — Combine with proactive provisioning